TV Wall Mount Installation: A Comprehensive Guide for a Professional Setup
Mounting your TV on the wall can be a great way to save space, enhance your viewing experience, and give your living room a sleek, modern look. Whether you’re upgrading your entertainment space, DE cluttering wall mount installation the room, or simply aiming for a more polished aesthetic, a TV wall mount installation offers a practical and stylish solution. However, to get the most out of this setup, proper installation is key. From selecting the right mount to ensuring the safety and functionality of your setup, this article will guide you through the process of TV wall mount installation.
Why Mount Your TV?
Before diving into the installation process, let’s first look at the benefits of wall mounting your television:
- Space-Saving: Mounting your TV frees up valuable floor space, allowing for more flexibility in your room’s layout.
- Improved Viewing Angle: Wall mounting can offer better viewing angles by positioning the TV at eye level. Depending on the room’s layout, you can adjust the tilt and swivel features to optimize comfort.
- Cleaner Aesthetic: A wall-mounted TV looks modern and sophisticated, helping to reduce the clutter associated with bulky furniture or media stands.
- Safety: For households with children or pets, a wall-mounted TV can help eliminate the risk of accidental tipping or tripping over furniture.
Choosing the Right Wall Mount
The first step in mounting your TV is selecting the correct wall mount. TV mounts come in several styles, each offering unique features:
- Fixed Wall Mount: As the name suggests, this mount holds the TV flat against the wall, offering a clean and simple look. It’s a great option if you’re happy with a fixed viewing angle.
- Tilting Wall Mount: This option allows you to tilt the TV up or down, which is ideal if you want flexibility in your viewing angle or if you plan to mount the TV higher on the wall.
- Full-Motion (Articulating) Wall Mount: Full-motion mounts are the most versatile. They allow you to extend, swivel, tilt, and rotate the TV, making them perfect for rooms where you might be viewing from various positions or angles.
When selecting a wall mount, make sure it is compatible with your TV’s size and weight. The mount should also be VESA-compliant, meaning it matches the standard mounting whole patterns on the back of your TV. Most mounts include a weight and size range on the packaging to help you choose the right one.
Tools and Materials Needed for Installation
To ensure a safe and secure installation, you’ll need the following tools and materials:
- Wall mount kit (appropriate for your TV size and weight)
- Stud finder
- Power drill with appropriate bits
- Level
- Tape measure
- Screwdriver
- Pencil for marking
Additionally, depending on the type of wall you’re mounting the TV on (drywall, brick, concrete), you might need specific anchors or screws, which are often provided with the mount kit.
Step-by-Step TV Wall Mount Installation
- Find the Ideal Spot: Before drilling, consider the location where you want to place the TV. The ideal height is typically at eye level when seated. Use a tape measure to mark the center of the wall where the TV will go.
- Locate the Wall Studs: Using a stud finder, locate the studs in your wall. TV mounts must be anchored into studs (not just drywall) for secure installation. Mark the edges of the studs to help you position the mount correctly.
- Mark the Mounting Holes: Hold the wall mount bracket against the wall, aligning it with the stud marks. Use a level to ensure the mount is straight. Once it’s aligned, mark the holes for the screws on the wall with a pencil.
- Drill Holes in the Wall: Using an appropriate drill bit, drill holes at the pencil marks you made. Be sure to drill into the studs, as this will provide the necessary support for the TV’s weight.
- Attach the Mount to the Wall: Line up the wall mount with the drilled holes and insert the screws into the studs. Use a screwdriver or drill to tighten the screws securely. Double-check that the mount is level.
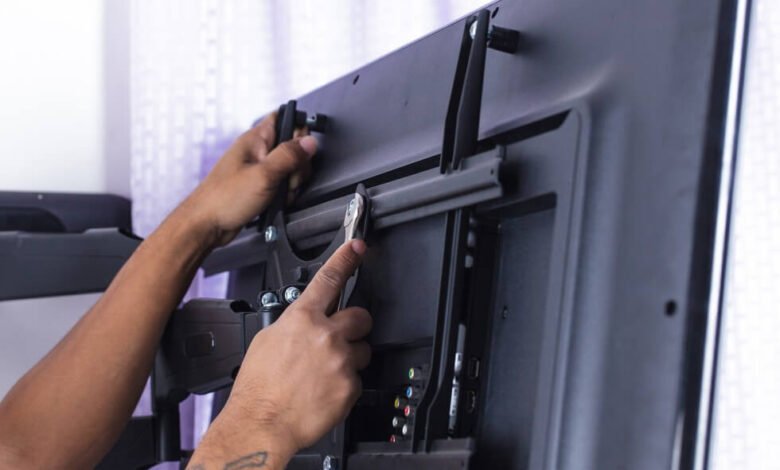
- Attach the TV Bracket: Now, attach the mounting bracket to the back of your TV. Most TV mounts come with screws that fit into the VESA holes on the TV. Be careful to use the correct size screws and don’t over tighten them to avoid damaging the TV.
- Hang the TV on the Wall Mount: With the help of another person (since TVs can be heavy), carefully lift the TV and hang it on the wall mount. Ensure that it locks securely into place according to the mount’s instructions.
- Check the Position: Once the TV is mounted, step back and check the viewing angle. If your mount allows tilting or swiveling, adjust the position for optimal viewing. Use a level to make sure the TV is perfectly straight.
Connecting Cables and Final Touches
After mounting the TV, it’s time to connect the necessary cables, including HDMI, power, and any other devices you wish to hook up. Consider using cable management solutions to hide and organize cables, keeping your setup looking neat and tidy.
For a more professional look, you can also install a wall-mounted TV bracket with an integrated cable management system, which allows cables to be neatly routed behind the wall.
Professional Installation vs. DIY
While mounting a TV on the wall can be a rewarding DIY project, it’s important to consider professional installation for larger, heavier TVs or if you’re unsure about drilling into the wall. Professional installers can ensure the job is done safely and correctly, especially if you have specialized requirements such as running cables through the wall or mounting on tricky surfaces.
Conclusion
TV wall mount installation can completely transform the look of your entertainment area, offering a sleek, modern design while saving space and improving viewing angles. By carefully selecting the right mount, following the proper installation steps, and ensuring the TV is securely mounted, you can enjoy a clean, professional setup for years to come. Whether you choose to install the mount yourself or hire a professional, the result will be an enhanced viewing experience and a more organized, stylish living space.